Content Snare can confirm who your client is and, if you need it, screen them against sanctions, politically exposed person (PEP), and adverse media lists, all inside a request.
The checks work for individual people only. To meet due diligence requirements for a company, trust, or other entity, verify the individuals connected to it, such as directors, beneficial owners, or trustees, each as a separate client.
Choose your verification provider
Content Snare works with two providers, and the choice comes down to whether you need AML screening. ComplyCube confirms identity and runs AML screening against sanctions, PEP, and adverse media lists. Stripe Identity confirms identity only. Pick ComplyCube when you have AML/CTF obligations to meet. Stripe Identity works when all you need is to confirm someone's identity. If your own compliance review needs it, ComplyCube publishes its security and compliance detail.
Which checks you have to run is dictated by your own internal AML/CTF policies. You set those checks when you configure the field.
The rest of this article covers the ComplyCube setup, since it includes AML screening. To set up Stripe Identity instead, see set up ID verification with Stripe Identity. To compare the two providers, see which verification provider should I use.
Turn on verification in your settings
Switch a provider on once before you add a verification field to any request.
- Click your avatar in the top right and choose Settings.
- Open KYC / AML.
- Turn on Enable Identity Verification.
- Turn on Enable ComplyCube Identity Verification.
Leave Enable Stripe Identity Verification on as well if you want both providers available to choose between on individual fields.
Add the KYC / AML field to a request
- Open Requests and open the request you want to add verification to.
- Add a field, and choose KYC / AML.
- Select the field to open its settings, where you pick the checks it runs.
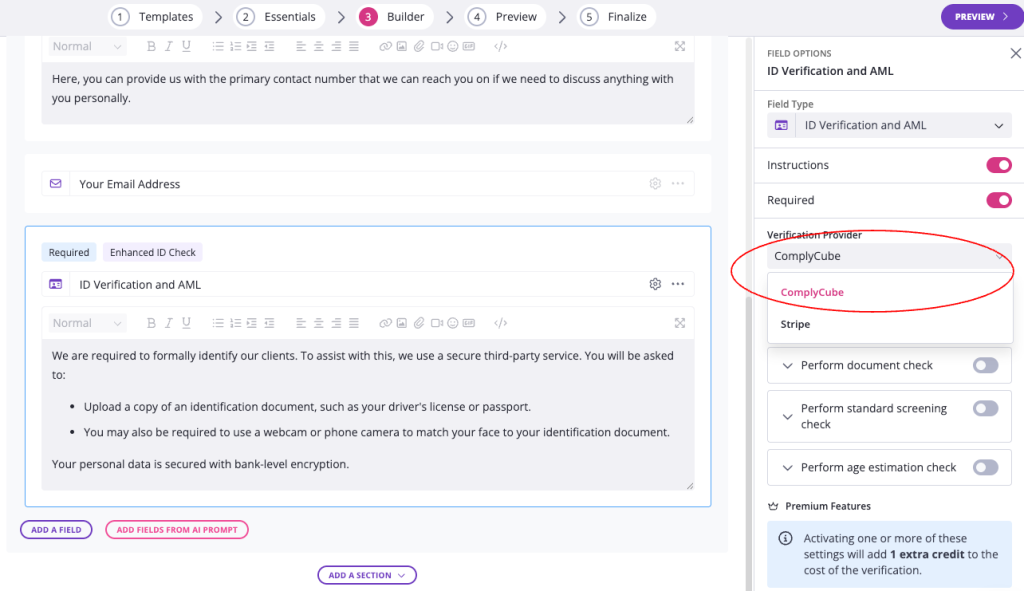
Choose the checks each verification runs
You decide which checks each verification runs, to match what your own AML/CTF program requires.
Some checks rule each other out, so the panel won't let you combine them:
- You choose standard screening or extensive screening, not both.
- Enhanced identity replaces the standard identity check.
- Age estimation can't run alongside enhanced identity, because enhanced identity uses a video and an age can't be estimated from one.
Turning on any screening check makes the client's date of birth mandatory.
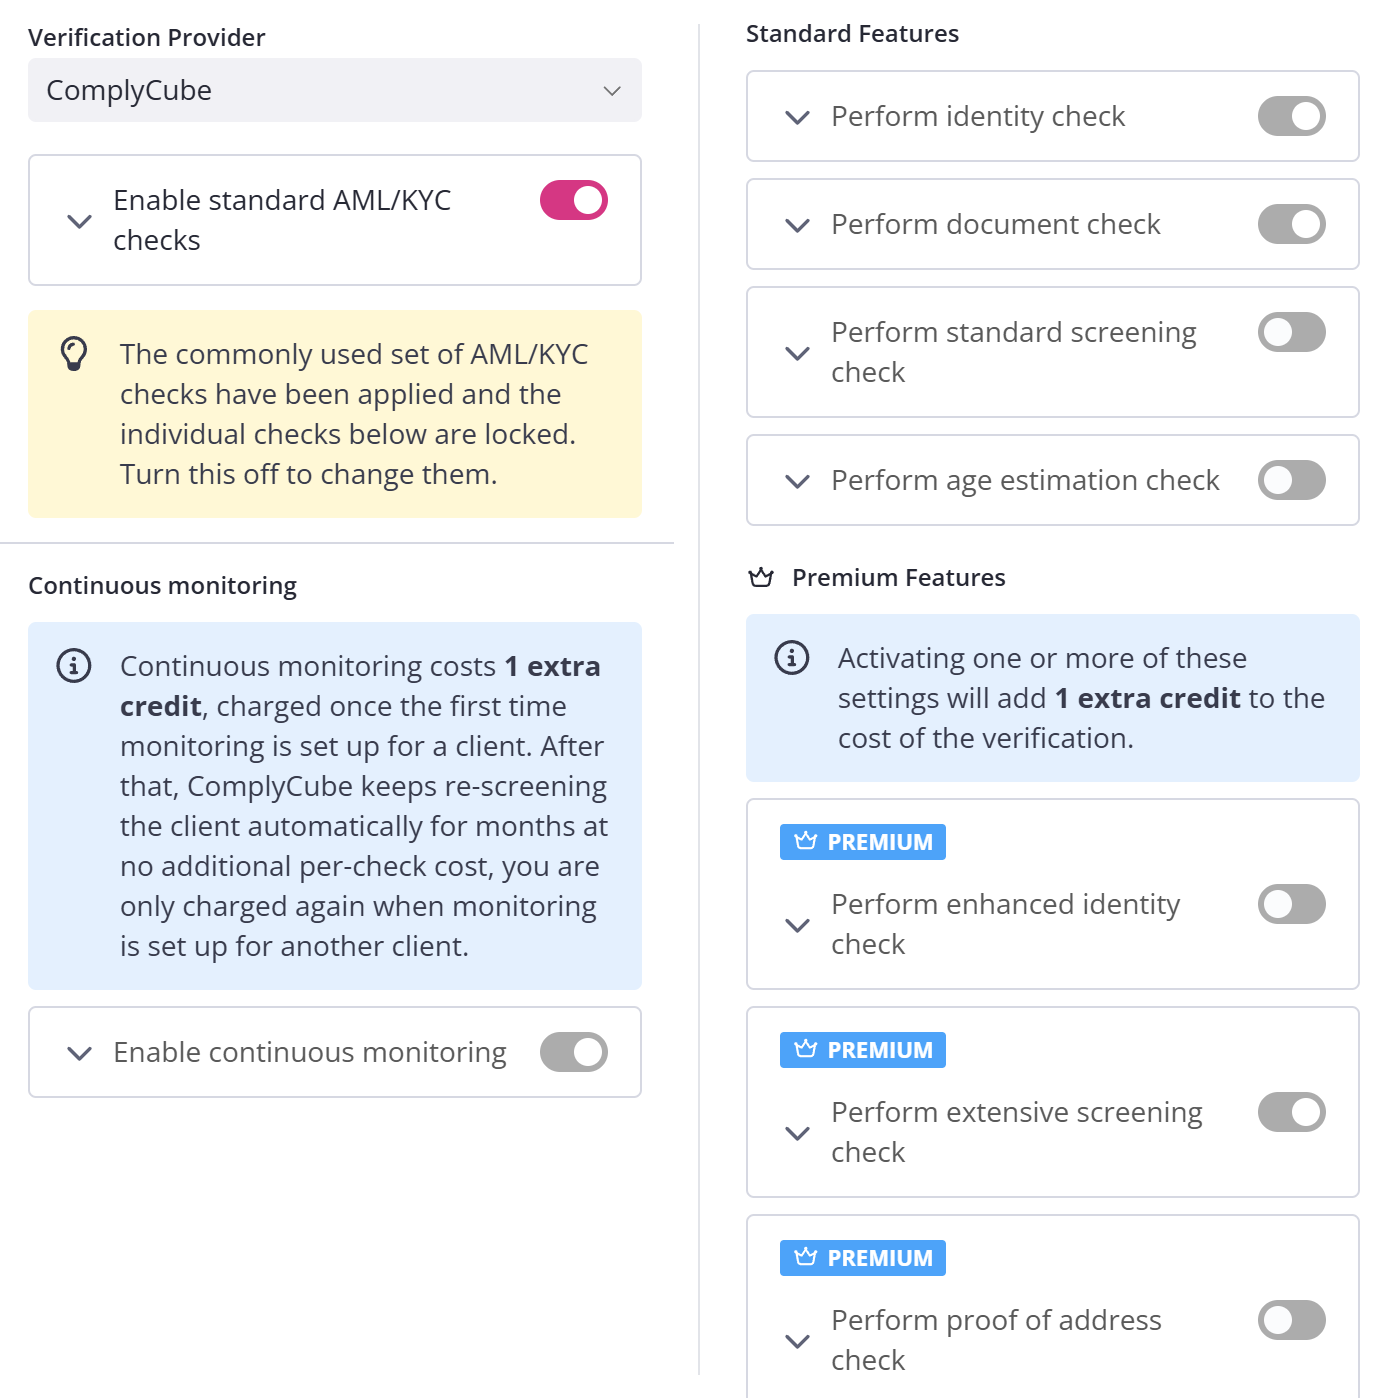
Enable standard AML/KYC checks sets the whole field up in one click, turning on the recommended KYC and AML checks for screening a new client. It switches on:
- the identity check
- the document check
- extensive screening
- continuous monitoring
Everything else is disabled. Two things to know before you use it:
- Extensive screening is a premium check, so the verification costs 2 creditsOne word that covers two separate meters..
- Continuous monitoring costs one more credit, charged once for that client.
Age estimation works out your client's age from their selfie and returns an age and a predicted range. Use it where the service you provide has an age-based eligibility requirement.
What a verification costs
A Stripe Identity verification is always 1 credit. A ComplyCube verification is 1 credit for standard checks, and 2 credits if any of these premium checks is on:
- proof of address
- enhanced identity
- extensive screening
Turning on two or three of them still costs 2 credits. A credit costs $5.
The credit comes off the moment your client begins the verification. If they cancel or decline consent before any check returns a result, you get the credit back. A verification that runs to the end and fails still uses the credit.
Your client needs an available credit before they can start, so keep a balance in your account. See verification credits for buying credits and turning on automatic top-ups.
What your client does
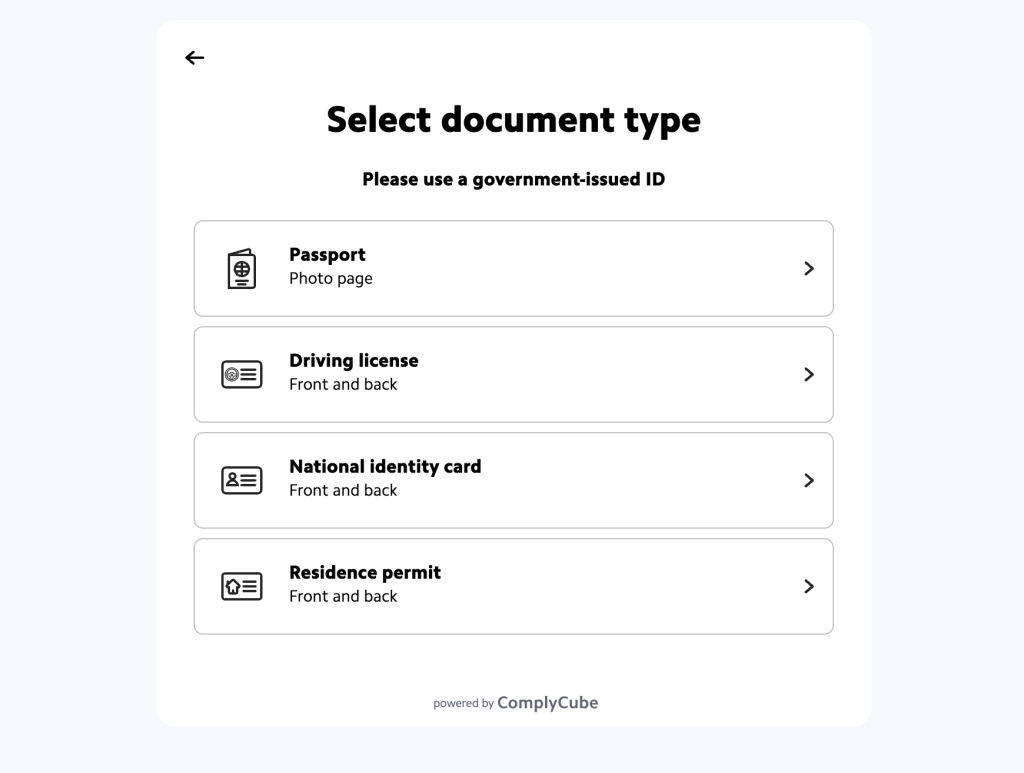
Your client completes the verification as one step within the request you have sent them, and what they are asked for depends on the checks you turned on. For an identity or document check they:
- Fill in their personal details.
- Photograph their identity document, front and back if it's needed.
- Take a selfie. The enhanced identity check asks for a short video instead.
A field running screening checks on their own asks for their details and date of birth, with no document and no selfie.
The screening runs in the background and your client never sees the results.
What the result shows on the field
After your client attempts the verification, the field heading tells you where it is up to:
- Verification in progress while the checks run.
- Verification complete once they finish.
- Verification incomplete if a check did not pass.
Your client sees the same messages on their own screen, where the failed one reads Verification not completed. If your client declines consent, the field shows the reason.
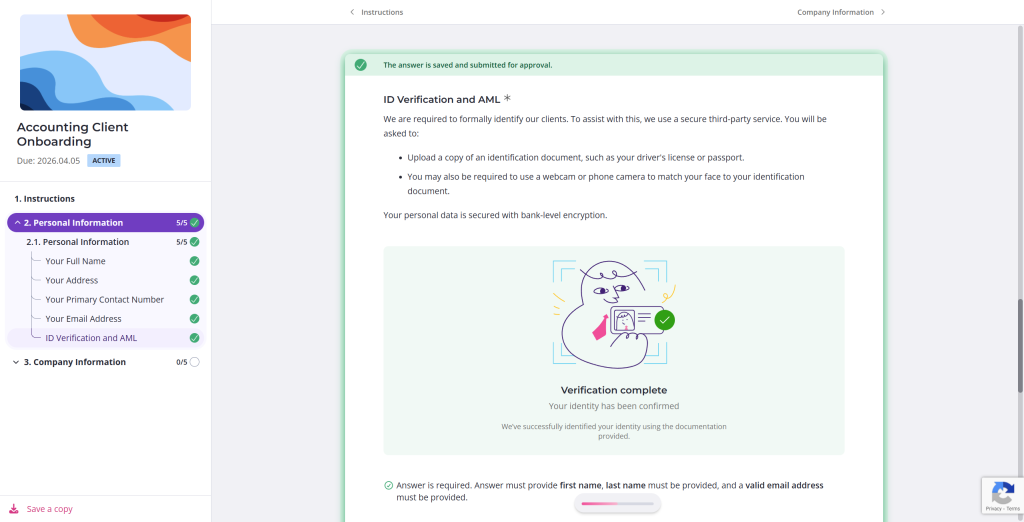
Verification complete means the checks finished, not that every one passed. A check that flags something, a sanctions or PEP match for example, comes back needing attention. The verification can still show as complete. Open each check before you treat anyone as cleared.
If a check fails
Allow retry on failed verification is off by default. If you leave it off, a failed verification still marks the field as complete, so you will need to reject the field before your client can try again. Turn it on if you want clients to retry themselves. Each retry uses another credit.
Review a flagged client
A flagged verification needs a person to make the call.
- Go to Clients and open KYC / AML.
- Open the client, which brings up their Verification Details.
- In the Review Failed KYC/AML panel, add a note in Reason (optional) if you want to say why.
- Choose Proceed or Don't proceed.
Content Snare saves the decision against whoever made it. The client's Verification Details then shows Reviewed by with your name, and Review notes with whatever you typed.
A Don't proceed stays in place through later rechecks. A Proceed covers only what was found at the time, so a client you clear today comes back for review if a later re-screen turns up something new.
A PEP match comes back with a level from 1 to 4, which tells you how senior the role is:
- Level 1. Heads of state, national government ministers and members of national legislatures.
- Level 2. Regional government officials, civil servants, senior military officers, judiciary members and central bank board members.
- Level 3. Religious leaders, state corporation executives, political party officials and international organization officials.
- Level 4. Mayors and other local government officials.
A match may also be the PEP's immediate family or a close associate rather than the PEP themselves.
To read the matches behind a flag and work out what they mean, see what to do when a verification check fails.
Who can see and download AML results
A per-person permission controls who can see AML and KYC results. An account created as an Administrator has it from the start. For everyone else it's off by default, and an administrator switches it on for any member, including themselves.
Downloading reports takes a second setting on top of that permission. An administrator turns on report downloads for the whole company, on the same settings page they use to turn on verification.
Download reports
Open a client under Clients, then KYC / AML, to reach their reports. You will find a Preview summary report for the whole verification and a report for each individual check. You need permission to see AML results to open either.
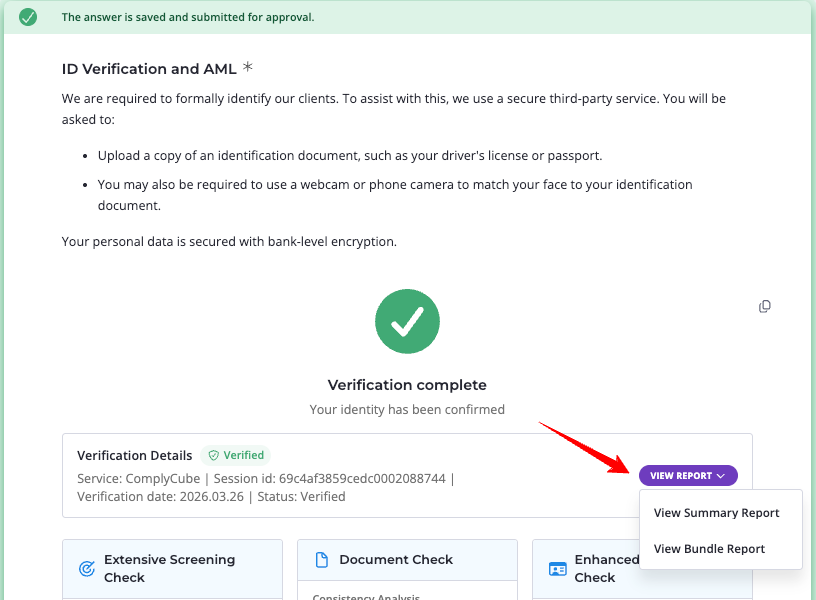
The Verification record table on the same page lists each check. Click the Files icon that appears when you hover over a check, or choose Files from its three-dot menu , to open what the check holds:
- Front of document
- Back of document
- Photo
- Video
A check shows only the files it has, and you can open them even if the check failed. If a check holds only one file, its name shows in place of Files and opens it directly. You can view these files but not download them, even with report downloads turned on.
Content Snare asks for your password the first time you open a report or file for a client. It asks again after a few minutes, or when you leave the client's page.
If you want to see a finished report before you meet a real one, Content Snare has sample reports for a fictitious client you can follow along with. The extensive screening sample shows what a flagged match looks like in practice.
These reports hold highly sensitive personal details about your client. Store them, and anything you share, securely in line with your data-handling and retention obligations.
Keep monitoring a client after the first check
A verification only tells you what was true when it ran. Turn on Continuous monitoring and Content Snare re-runs your screening check every month, charging 1 credit once for that client. It covers only what you originally enabled.
See continuous monitoring for how it works and where each month's results appear.