What Stripe Identity checks
Stripe Identity confirms a client is who they say they are by checking a government-issued photo ID, and optionally a selfie. It handles identity checks only. If you have AML obligations, choose ComplyCube instead, the other provider Content Snare offers. Stripe says it can verify documents from over 120 countries. For the detail of what Stripe checks and how, see Stripe's own Identity documentation.
Turn on ID verification
Turn ID verification on in Settings, otherwise your client can't complete the field even once it is on their request.
- Click your avatar in the top right.
- Choose Settings.
- Open KYC / AML.
- Tick Enable Identity Verification.
ID verification is available on every plan. On a free trial, you need to add a payment method before you can use it.
Add a verification field to your request
- Open Requests and open the request you want to add verification to.
- Add a field the same way you add any other question.
- Set Verification Provider to Stripe.
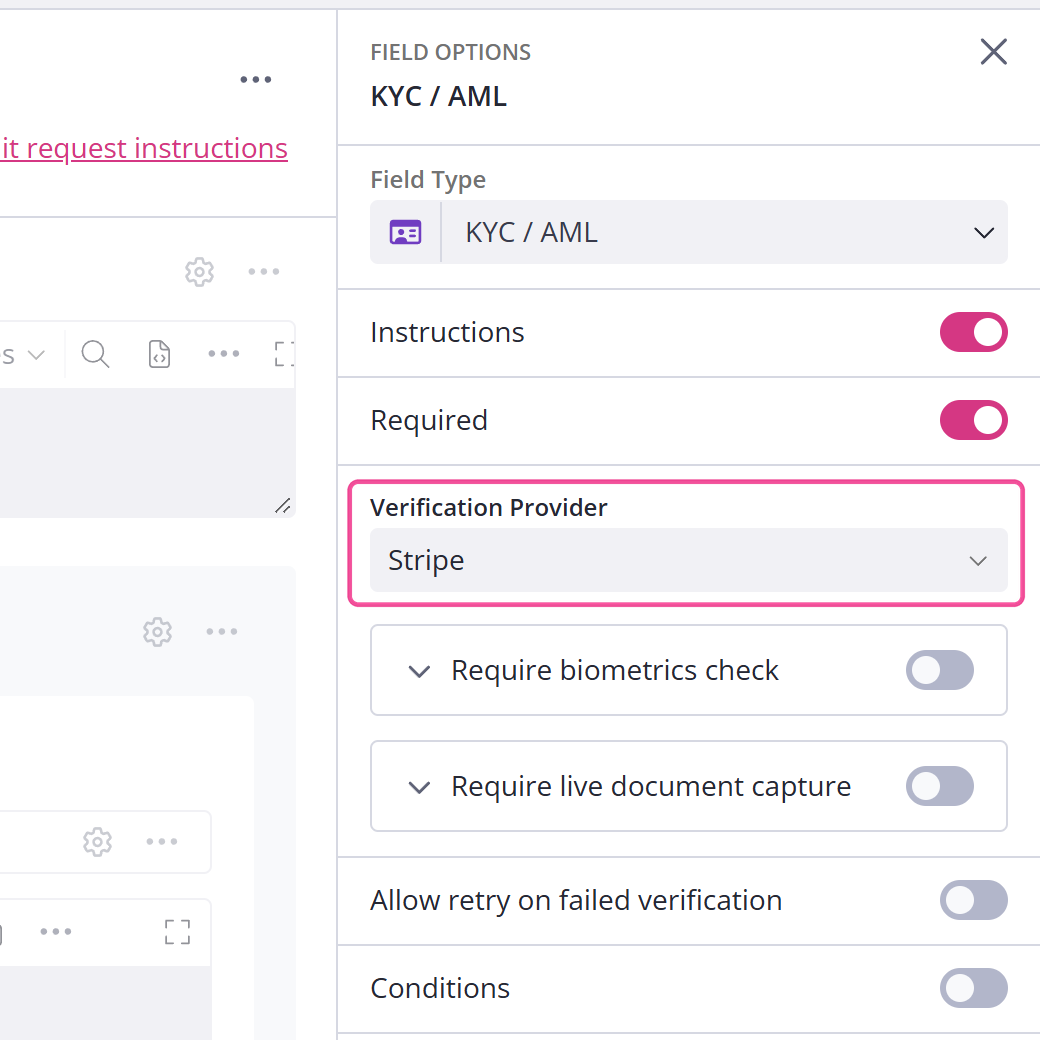
Choosing Stripe adds two extra options, both off by default:
- Require biometrics check takes a selfie and matches it to the photo ID.
- Require live document capture makes the client hold the document up to the camera instead of uploading a saved photo.
By default a client gets one attempt. If the check fails, the field is still marked complete, so a request can read as finished even though the ID was never confirmed. To give the client another go, either reject the answer or switch on Allow retry on failed verification before they start. Retry uses another creditOne word that covers two separate meters. for each attempt.
What each verification costs
Each verification uses one credit, taken the moment your client starts. If they cancel or decline consent before Stripe returns a result, the credit goes back to you. A failed verification still uses the credit.
A client needs an available credit to begin, so keep some in your account. See verification credits for buying credits and setting up automatic top-ups.
What your client sees
Your client starts by clicking Verify your identity. Stripe asks them to agree to its terms, then walks them through capturing or uploading their ID, plus a selfie or live capture if you turned those on.
If they decline consent, the field shows as Verification not completed with a note that consent was not given, and the credit returns to you.
Reading the result
While Stripe works, the field shows the verification in progress. When it succeeds you see Verification complete with a one-line summary of who was verified, when, and the document type and issuing country they used. That summary is normally enough to confirm the ID was checked. If it does not pass, the field shows Verification not completed.
See a full identity report
The full report can include restricted personal information such as date of birth, document expiry dates and copies of the submitted documents, so access requires two settings and a password. An administrator turns on Allow report downloads? and accepts a responsibility statement for handling that data, then grants report access to each team member who needs it, from that member's details page. Opening or downloading a report also asks you to re-enter your account password. Only enable it if you have a legal reason to hold that information.
Once it is on, open a report by clicking View Identity Report under the verification field.
Find a client's verification history
To see everything a client has verified, go to Clients, open KYC / AML, then select the client.