If you’re a bookkeeper or accountant, and on the lookout for new ways you can use Content Snare, this is the article for you.
It’s no fun chasing clients for responses to uncategorized transactions. Here’s how you can use Content Snare to make it easier.
Some people like to split every transaction out into it’s own question, but tables make it much faster to send out.
Summary
Each step is detailed below, but here’s a quick summary if you want to give it a go without reading everything below.
- Add a table to your request
- Set up the columns to match the unreconciled transactions report you get from your bookkeeping software
- Lock the columns that clients shouldn’t edit
- Paste in the data from the report
The result will look something like this on your end:
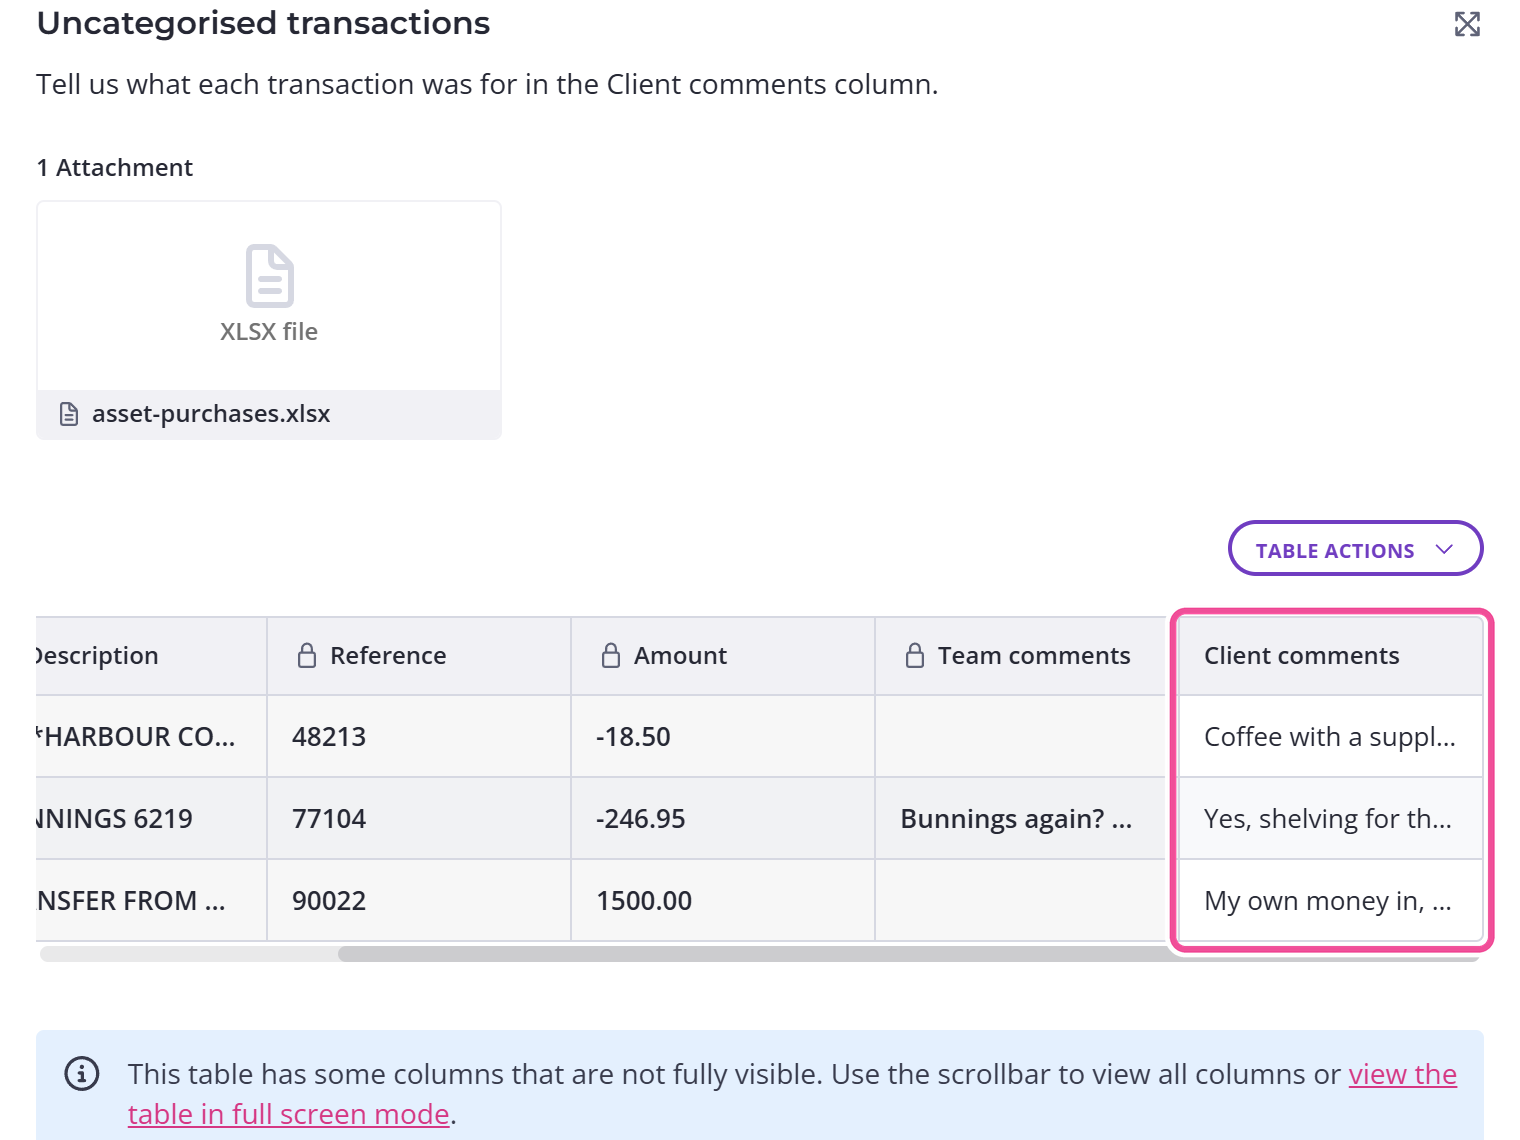
On your client’s end, they’ll be able to see all the info and answer in the final column:
Step 1: Set up a table
When you’re creating a request, add a table field, like this:
Then set up your columns to match the unreconciled transactions report that you get from your accounting software.
It’s important that the columns match up, so that you can easily copy and paste the data in.
If your report looks like this:
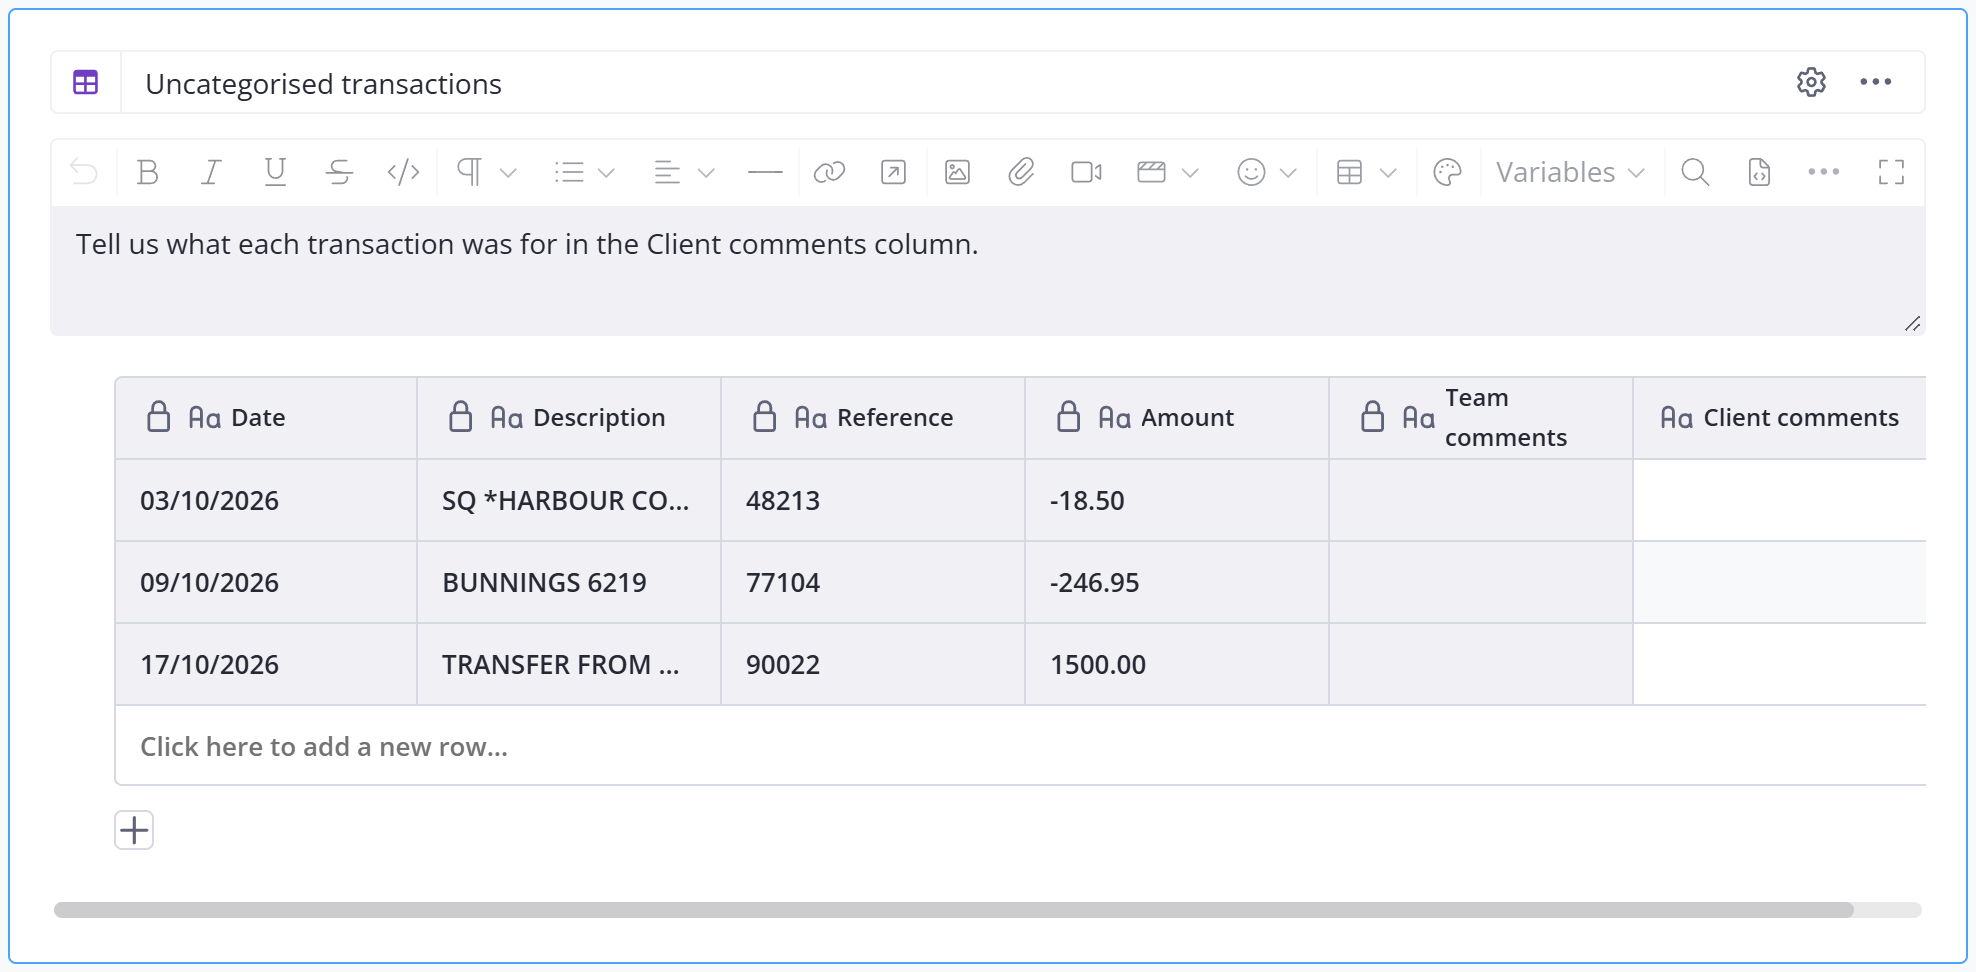
You might set up your table in Content Snare like this:
Note that the Date, Description, Reference and Amount columns appear in the exact same order. You’ll see why in a moment.
The first 5 columns are set as locked. This means that your client won’t be able to edit the information in those columns. However, you can still paste in your queries.
Step 2: Save the section as a template
At this stage, you may wish to save the section as a template called “Bookkeeping Queries.”
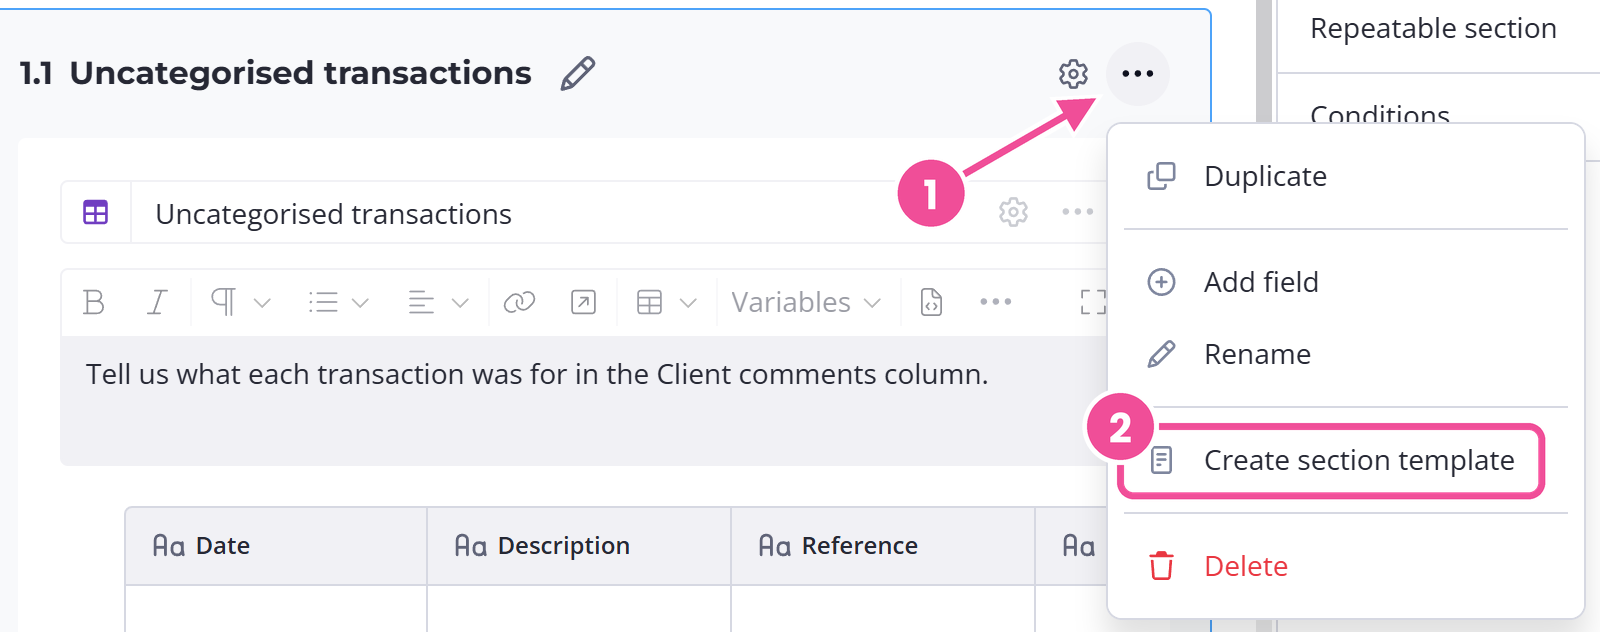
That way, next time you want to add the same table to a request, you can add it quickly.
Step 3: Paste in your queries
Now, you can paste in the queries directly from your spreadsheet. Copy the cells like this:
Select the top left cell in Content Snare and paste them in:
Step 4: Add your comments and send
In the “Team comments” column, add any extra info you’d like to provide your client, or any questions you would like to ask.
Then send the request like you normally would.
That’s it!