How your emails send by default
Your client emails send from Content Snare's domain, contentsnare-mail.com, with your organization shown as the sender. The message looks like it comes from you, but the sending address is Content Snare's. If your client replies, the reply goes to your email address.
Sending from your own domain is part of custom branding. If you're on Basic, the Add Domain button stays grayed out, so upgrade to a plan with custom branding first. On a plan that includes custom branding, you add your domain and two DNS records, and your client emails start sending from your own address once the domain is verified.
Add your domain
- Click your avatar in the top right, then choose Settings.
- Choose Branding, then open the Email domain tab.
- Type the domain you want to send from, or pick one Content Snare has already detected from your team.
- Press Add Domain.
Add the two DNS records
Adding a domain opens a popup with two records to create in your DNS: DKIM (TXT Record) and Return-Path (CNAME Record). Your domain shows as Verified once both are in place.
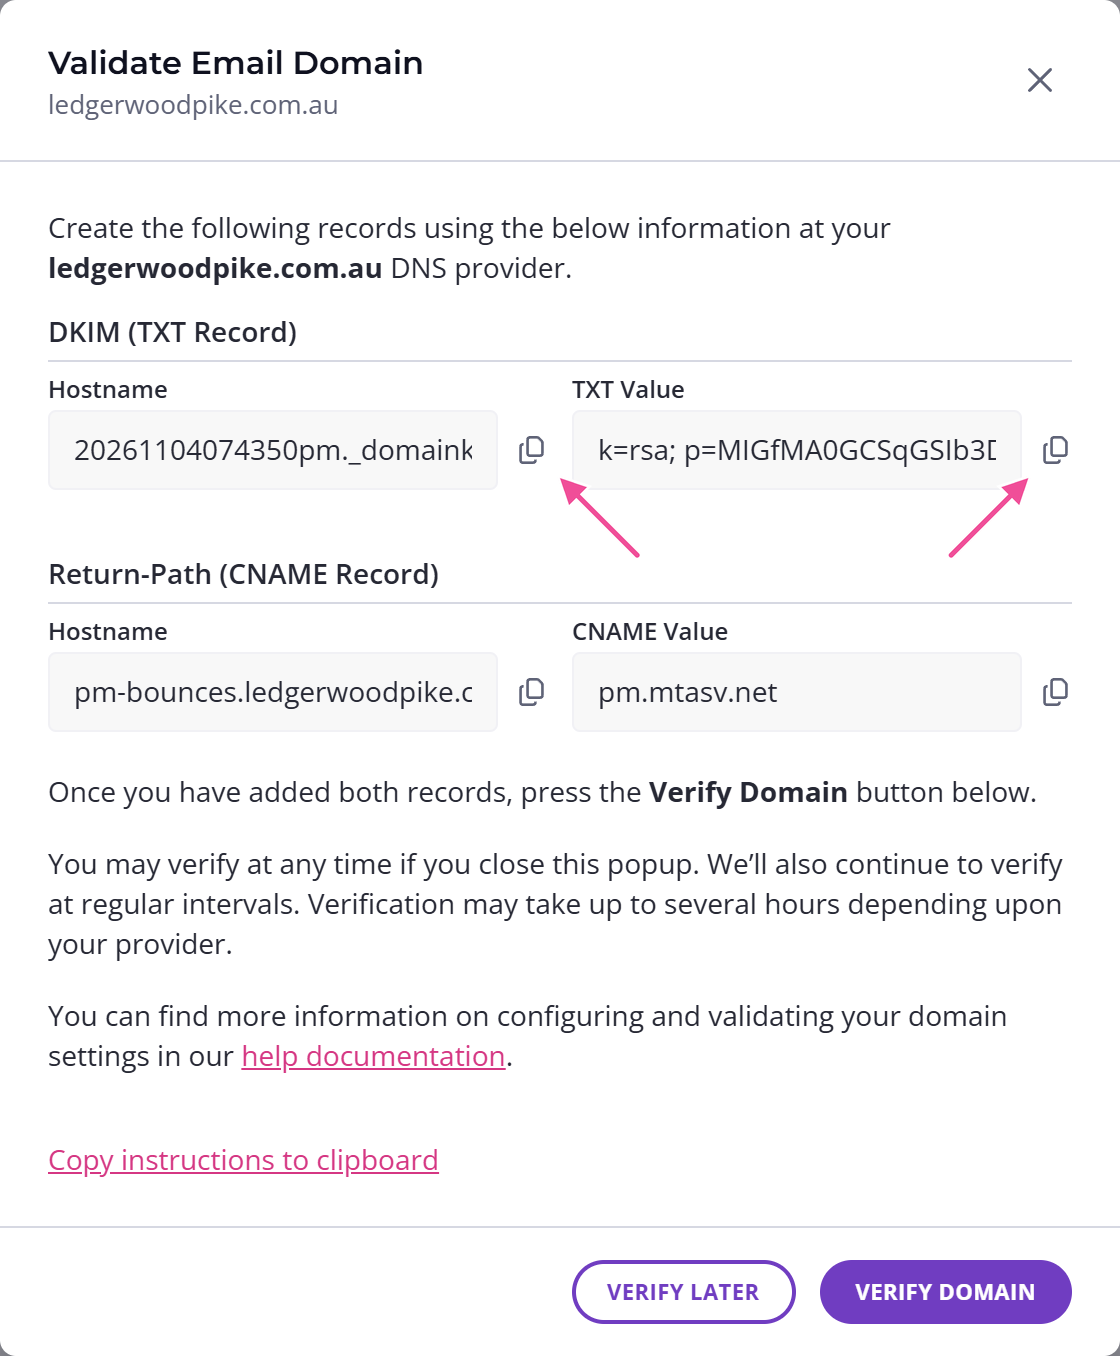
If you don't manage your domain's DNS yourself, forward these instructions to whoever looks after your website or domain.
Copy the hostname and value straight from the popup using the copy icon , rather than typing them from an example. The values shown are specific to your domain and differ from any guide's examples.
Two things vary by provider:
- For the DKIM record's name, some providers only want the part up to and including domainkey. If your provider is one of those, drop your domain from the end.
- Any TTL works.
Verify your domain
Once both records are in your DNS, press Verify Domain. When Content Snare finds both, the domain shows as Verified and your client emails start sending from your own address.
DNS changes can take up to 48 hours to propagate, so the domain may not verify the moment you add the records. You don't have to leave the popup open or keep pressing the button. Select Verify Later and Content Snare keeps checking on its own for three days, flipping the domain to Verified once the records show up. After that it stops checking by itself, so come back and press Verify Domain. You can press it any time you want to check right away.
Leave both records in place afterwards. If you remove or change one later, the domain goes back to unverified and your emails send from Content Snare's domain again.
If your domain won't verify, or it verified before and has gone back to unverified, see my domain won't verify.
Multiple email domains
Each domain is verified separately. If different team members send from different email domains, set up each domain. Verifying a single domain only covers the people on that domain, so everyone else keeps sending from Content Snare's address until their domain is verified too.
Using the same domain on more than one account
You can set a domain up on one Content Snare account at a time. If you run more than one account and want all of them sending from the same domain, get in touch with our team and we'll set it up for you.