Instructions are the notes you add to a request to tell a client what you need and how to provide it. Good ones save you from chasing corrections and answering the same question twice. You can add them at four levels, and they hold more than plain text.
The four levels of instructions
You can write instructions for the whole request, for a page, for a section, or for a single question. Each covers a different part of the request:
- Request instructions are the first thing a client reads when they open your link, so use them to welcome them and explain what the whole request is for.
- Page instructions sit at the top of a page and set up the questions on it.
- Section instructions sit above a group of questions and explain what that group is for. In an accounting request, a section might say "The following questions relate to the ABC Trust, for the period July to December."
- Field instructions sit above one question. These are the ones you'll write most often.
To work on any of them, open Requests and choose Edit on the request. Request instructions are on the request's first screen. Page, section and field instructions are in the request builder, next to the item they belong to.
What you can put in instructions
Each instruction box uses the full editor. You can add:
- Formatting like bold, headings and lists, which help a client skim to the part that matters.
- Links to a form, a login page, or an example online.
- Images, such as a sample of the document you want or a screenshot showing where to click.
- Video from YouTube, Vimeo or Loom. Paste a link from any other site and it won't turn into a player.
- Files to download, covered below.
- Variables like your client's name or the due date, covered below.
A checklist you add is read-only. The client can read the items but not tick them, so use it to list what they should gather before they start.
For everything the editor can do, see format text, add media and use the editor.
Give a client a document to complete
To give a client a document to fill in and return, such as a spreadsheet, attach it to your instructions with the Attach file icon so they can download it, then add a file upload question for them to upload the completed version. Each attached file can be up to 20 MB.
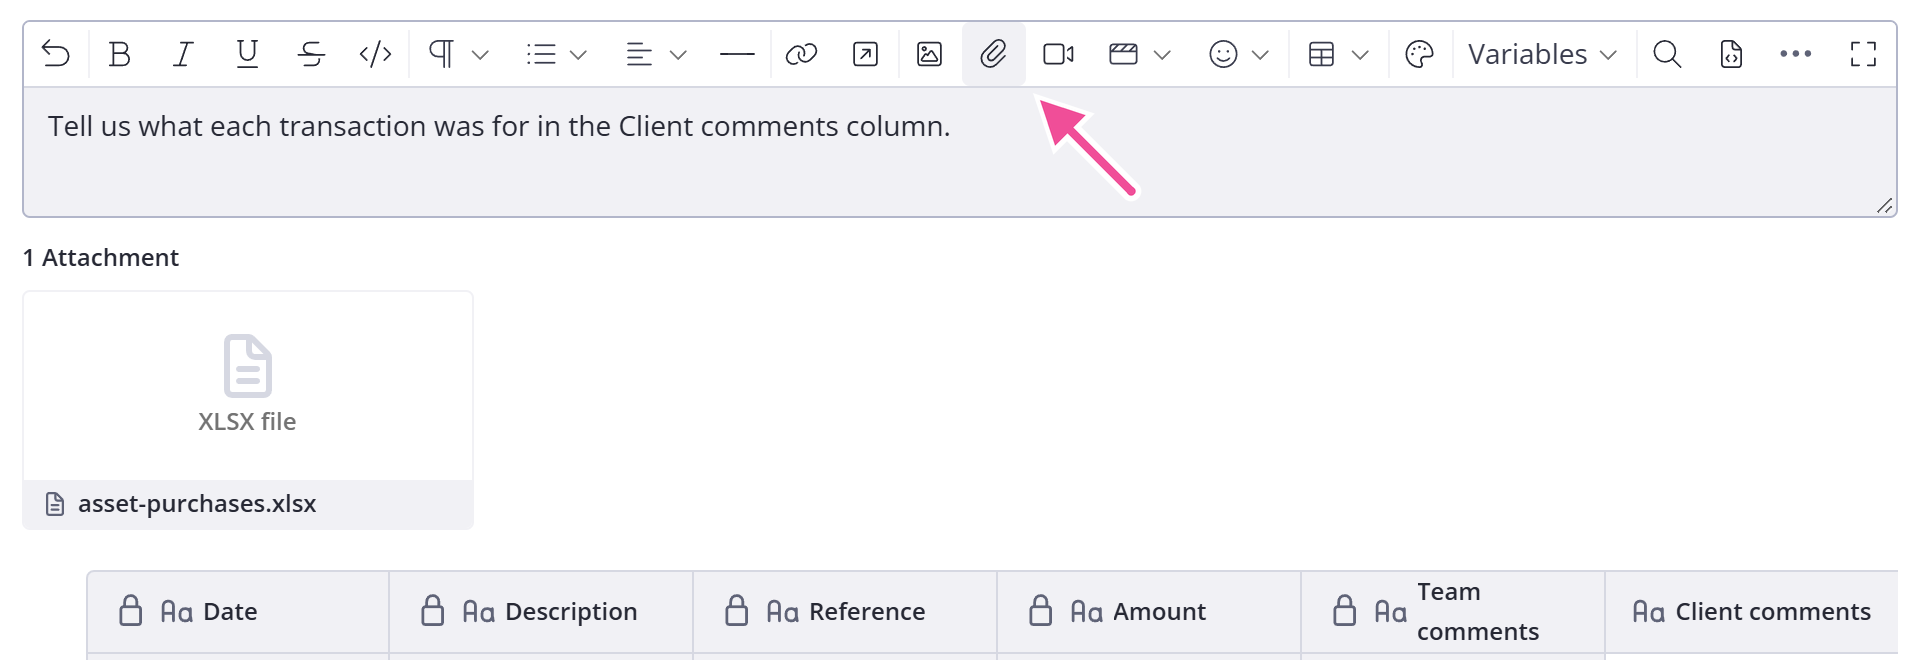
The client downloads your file, fills it in with their own software, and uploads it back as their answer. See field types for the upload question to pair it with.
Add variables like your client's name
A variable fills in a detail like your client's first name when they open the request. Type "Hi", add Client first name, and a client called Anna sees "Hi Anna".
To add one, choose it from the Variables menu in the toolbar. You can also type /variable, press Enter and pick one from the list. To narrow the list, add a word after it, such as /variable first.
You can choose from:
- Your client: Client name, Client first name, Client last name, Client salutation, Client email and Client company
- Every client on the request: All Client Names and All Client First Names
- The request owner: Request owner, Request owner first name, Request owner last name and Request owner email
- Your organization: Company name and Company Contact
- The request: Request name, Request due date and Folder name
On a request with several clients, each client sees their own details in the client variables. To name everyone, use All Client Names or All Client First Names. They list every client on the request, starting with the first one, as in "Anna and Ben".
Variables also fill in when you export a request with its instructions. When you or your team open or export a request, the client variables show the first client's details.
If there's nothing to fill in, such as a client with no salutation or a request with no due date, the variable stays blank. Folder name needs the request to be in a folder, and the owner variables need it to have an owner.
To add variables to the default instructions that new requests start with:
- Click your avatar in the top right.
- Choose Settings.
- Open Request Settings.
- Add them to the text under Default request instructions.
When you start a request from scratch, it gets a copy of your default instructions, and its variables fill in with that request's own client details. If you make a request from a template or copy another request, it starts with the instructions from that template or request instead, so add your variables there too. Requests you've already made keep the instructions they had.
Write instructions clients can follow
Keep instructions short and specific. A wall of text is as hard to act on as no instructions at all. When you write them:
- Remove any doubt about what you need. Say how much detail to give and where to find the information if they don't have it on hand.
- Use plain language. Short sentences, and no jargon or abbreviations a client outside your field won't know. The Hemingway editor is a free tool that highlights sentences that are too long or hard to follow.
- Break it up with formatting. Lists and bold text help readers find the important points.
- Show, don't only tell. Add an annotated screenshot for a task in other software, or an example image so a client knows what a good answer looks like.
- Film a short video for anything fiddly, such as logging in to another system to find a number.
If you can't explain a question in plain words, the question itself is probably too complicated. Reword it.
For more on creating great requests, see how to create great requests.
Think of each instruction as something you would say out loud to the client. If you would phrase it differently face to face, rewrite it until it sounds like that.
You can also embed a video in your instructions if it's easier to show than to explain.
What to write in your request instructions
Request instructions are the first thing a client sees, so treat them like a welcome page. New requests start with your organization's default instructions, or general starter text if you haven't set any. Replace that text with something that fits your request. Cover:
- Who you are, and that they're in the right place.
- What the request is for and why you need the information. Clients don't always know why you're asking.
- Roughly how long it takes, so a longer request doesn't come as a surprise.
- A short intro video, if a walkthrough would help a first-time client.
Show or hide instructions
Each instruction box has its own on/off control. To show or hide instructions for a page, section or field:
- Select that item in the builder.
- Open its settings.
- Switch the Instructions toggle on or off.
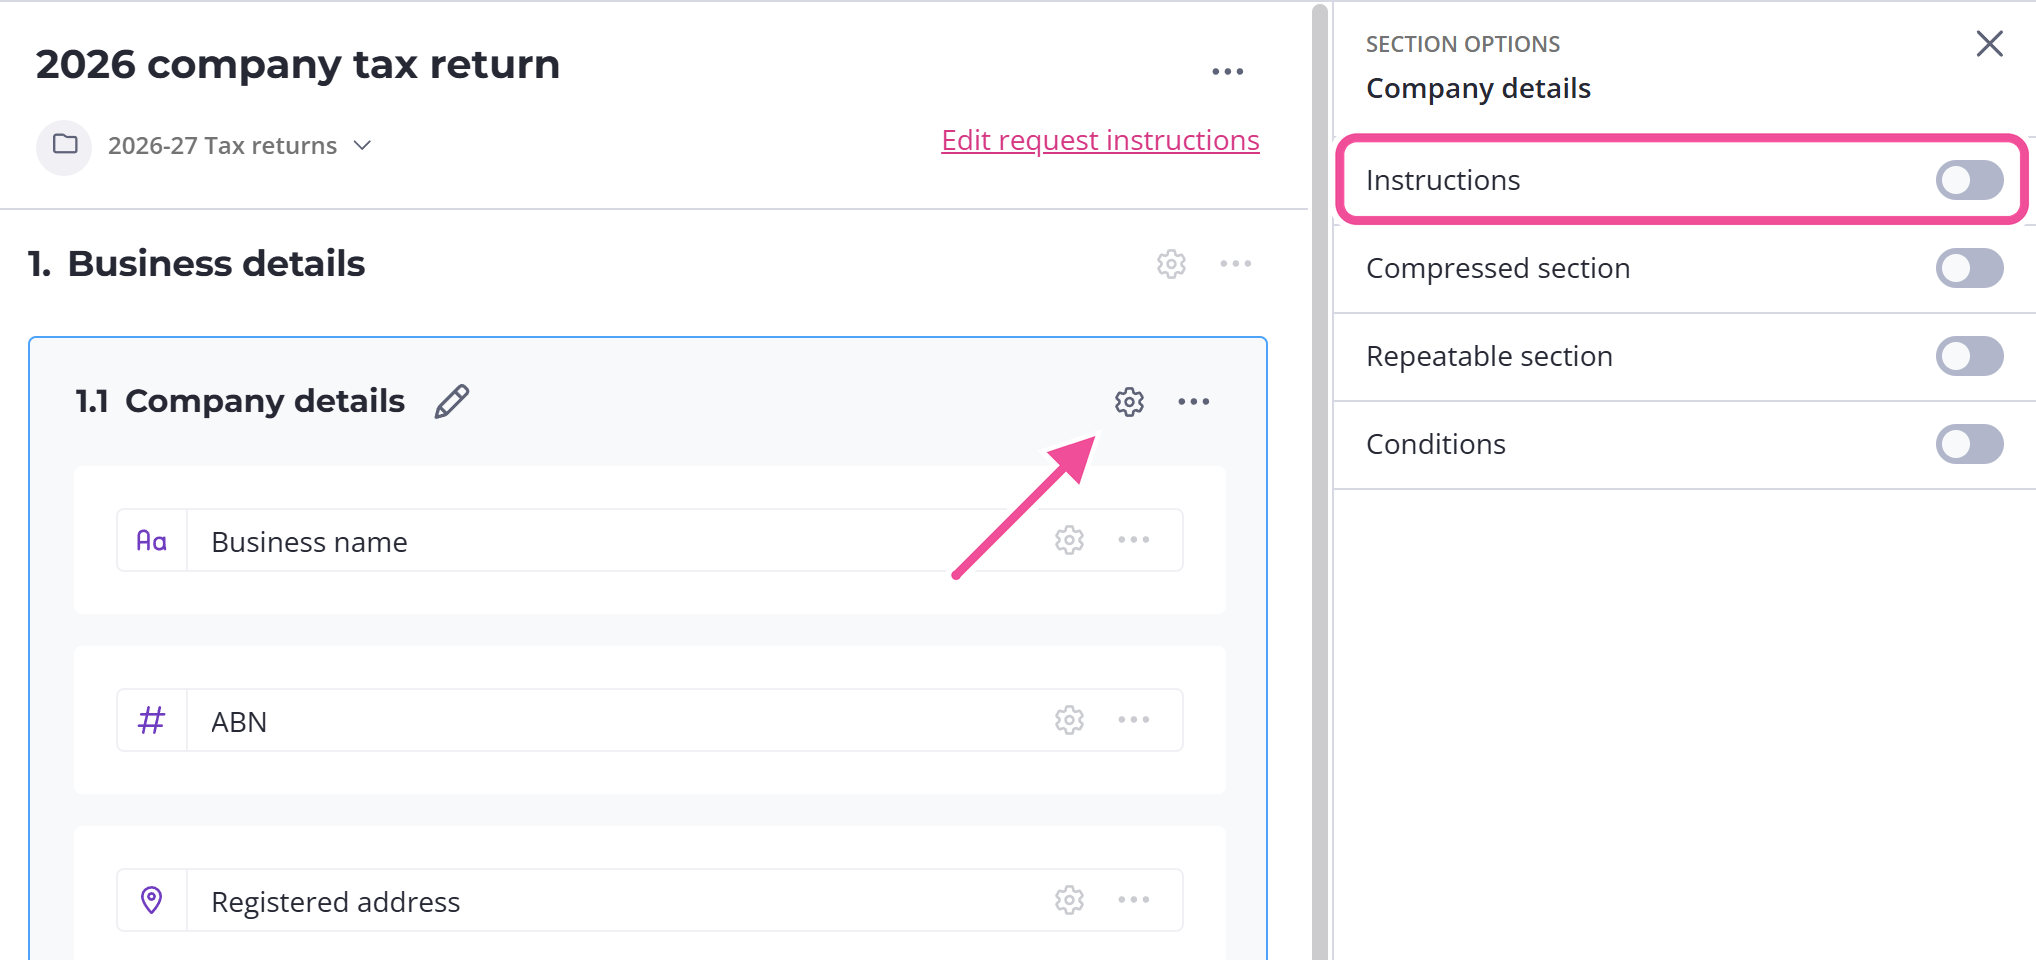
New requests show the request instruction box automatically. Enable Request Instructions on the request's first screen turns it on or off for that one request. To change what new requests start with:
- Click your avatar in the top right.
- Choose Settings.
- Open Request Settings.
- Set Enable request instructions by default.
Page and section instructions start off by default, so you need to switch the toggle on before clients can see them. Field instructions start on.