Annature signs documents electronically. Once it's connected, you can send a document from any request for your client to sign, and Content Snare marks the field complete when signing is done.
For the parts that work the same whichever provider you use, including what gets signed and where the signed document ends up, see how signing integrations work.
Get your Annature credentials
Content Snare needs three details from your Annature account: an Access ID, an Access Key, and a Sender Account ID.
To find the Access ID and Access Key:
- Log in to Annature and open Developers, then the Keys section.
- Create a new key.
Annature shows an Id and a Key. The Id is your Access ID and the Key is your Access Key.
To find the Sender Account ID:
- Open your profile menu in Annature and choose My account.
- Copy the Account Id at the top of the page.
This sets which Annature account your signing requests are sent from. To send from a different account, use that account's Account Id instead.
Connect Annature in Content Snare
Only Administrators can connect Annature.
- Click your avatar in the top right, choose Settings, then Integrations, then the Applications tab.
- Find Annature and start the connection.
- Paste in your Access ID, Access Key and Sender Account ID, then click Activate.
Content Snare checks the three values with Annature before saving. If one is wrong, the connection isn't saved. Fix the values and click Activate again.
Set up the signing email
Once your credentials are accepted, the same popup asks for the email your client gets when a document is ready to sign. Fill in an Email Subject and an Email Body, then click Update.
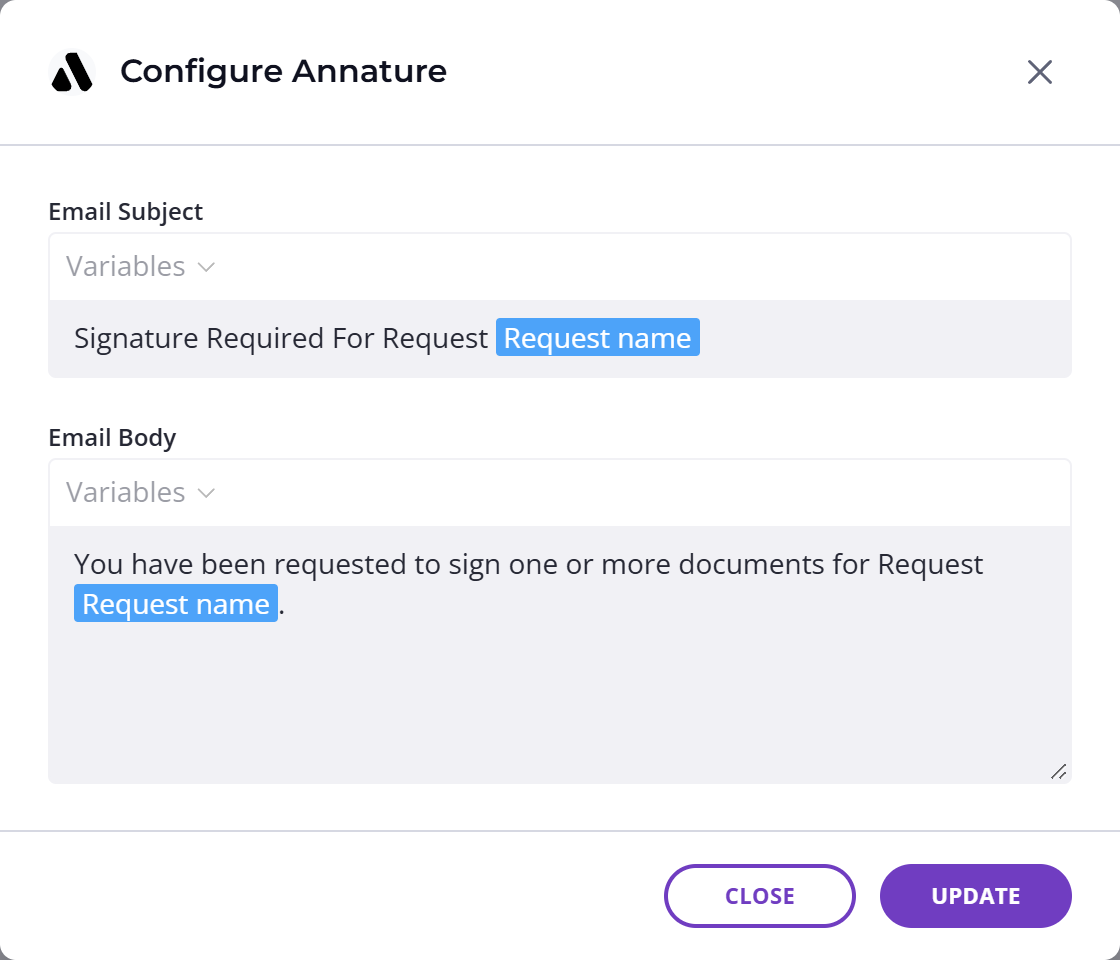
Both fields are required, and no signing request goes out until they're filled in. Content Snare gives you default wording you can edit, and you can drop the request name into either field so each email names the right document.
Add a signature field to a request
- Open Requests.
- Choose Edit on the request you want to change.
- Add a Signature field to a page.
- Switch on Enable external integration and set Signature Integration to Annature.
- Under Where The Signing Will be Done, choose whether your client signs the request PDF export or the files they upload.
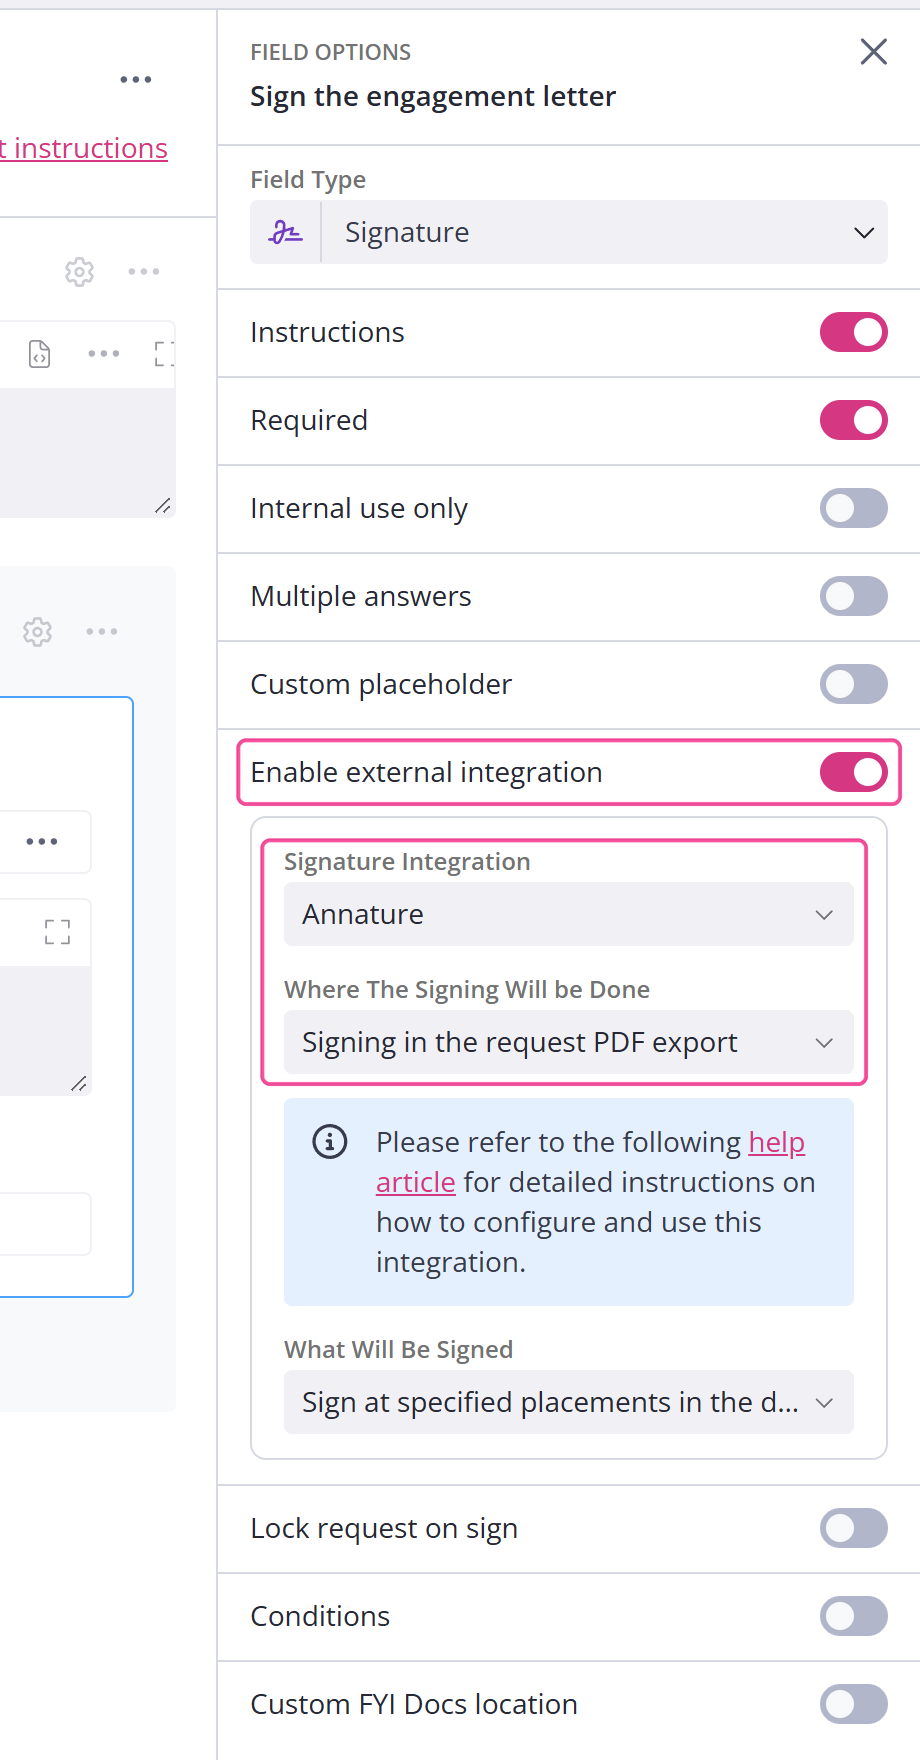
With Annature, signing always happens at the placements marked in the document. How signing integrations work covers both choices in full.
Add signing tags to uploaded documents
You only need these tags when you upload files to sign. If your client is signing the request PDF export, Content Snare places the tags and you can skip this section.
Every document you upload to sign needs at least one STANDARDSIGNTAG, or Content Snare rejects it. STANDARDSIGNTAG marks where the client signs. Add SIGNEDDATETAG where you want the signing date to appear, and Annature fills in the date automatically.
To add them:
- Open the document in Word, Google Docs or a PDF editor.
- Place each tag exactly where you want the signature or date to appear.
- Set the tag text to white, so it stays out of sight in the finished document.
- **Save the document as a PDF. Annature only accepts PDFs, and the file must be under 10 MB.
- Upload it to the request.
Lock the request after signing
Turn on Lock request on sign to lock the request once your client signs, so their other answers can't change. This is optional, and it works the same way on Content Snare's own signature fields. How signing integrations work covers what your client has to do to change something afterwards.
If signing stops working
If Annature stops accepting requests, Content Snare deactivates the integration and your client sees a message saying the integration isn't connected and to contact the request owner, with Sign switched off. Click your avatar, choose Settings, then Integrations, then the Applications tab, and reconnect Annature.
If a document your client uploads is turned away, check that it's a PDF and contains at least one STANDARDSIGNTAG, spelled exactly.
If a signing request is stuck and your client can't complete it, void the envelope in Annature before asking them to sign again.
Disconnect Annature
Click your avatar, choose Settings, then Integrations, then the Applications tab. Choose Remove on Annature and confirm with Deactivate.
Removing also asks Annature to delete the connection Content Snare created. If Content Snare can't reach Annature, removal fails and you're asked to try again. Wait a moment, then choose Remove again.