A quick request is the fast way to send a template you have already built. You pick a saved template, choose the client, and publish. Use it for requests you send again and again, like a monthly bookkeeping checklist or a new-client onboarding pack.
A quick request always starts from a template, either one you have saved or one of Content Snare's ready-made ones. To build your own first, see create and edit templates.
Pick a template
- Click New in the top right of the dashboard, then choose Quick request. The Quick Request Creator opens.
- Use the category filter or the search box to find the template, select it, then click Next.
Fill in the details and publish
The next screen is a short form. Fill in:
- A name so you can find the request later.
- The client or clients who should receive it.
- A communications schedule to set when reminders go out. Reminder schedules are managed separately.
- When it sends, now or on a date you pick.
- A due date for the client to work to. If you schedule the request, check the due date after you choose the publish date.
- Close client access after the due date, if you want the client's link to stop working then. Access ends on the due date at the time of day you publish the request, in your organization's time zone, and the request's status becomes Expired.
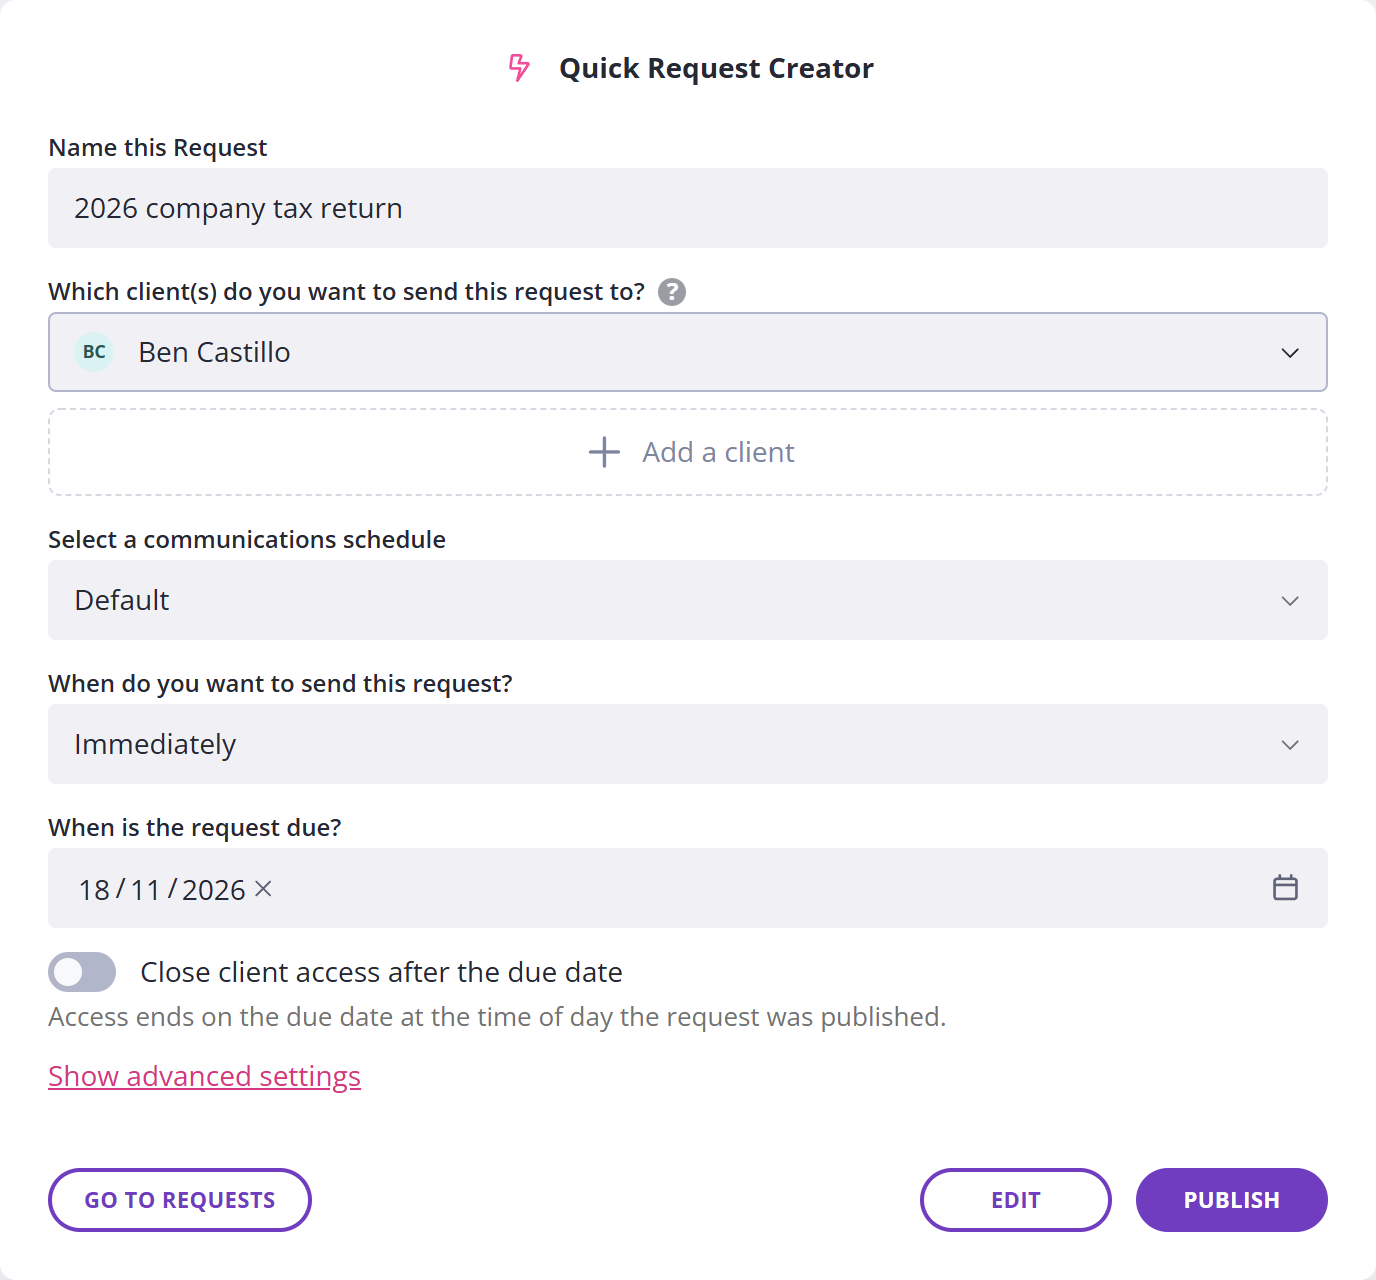
Then click Publish. If you set it to go out on a future date, the button reads Schedule instead.
Publish stays grayed out until the request has a name, at least one client, and a due date.
Adjust the request before you send
Click Show advanced settings to set the request ownerThe one team member assigned to a request., folder, guest access, a PIN, and the instructions your client sees. If your account allows client comments, you can switch those on there too.
To change the questions, click Edit. Content Snare saves it as a draft and opens it in the request builder, where you can add, remove, or reword questions.
Use a browser bookmark to jump straight to a template
If you send the same template week after week, a bookmark in your own browser saves you the first two steps.
- Start a new request and pick the template you want.
- Go on to the Essentials step.
- Bookmark that page in your browser. In Chrome, click the star at the right-hand end of the address bar.
From then on, opening the bookmark starts a new request with that template already chosen, and you go straight to filling in the details.