The quickest way to learn Content Snare is to send a request and get it back the way a client would. This guide takes you from your dashboard to a sent request, using a template to keep it fast.
Pick a template
From your dashboard, click Add new request. You land in the template library of ready-made requests.
Choose one that's close to what you collect. You can preview any template before you use it, then click Use This Template to open it. If none suit closely, the generic client intake form template is a safe starting point, or click Start from scratch and build your own.
Name it and set your instructions
This is the Essentials step. Give the request a name first. You'll use it to find the request later, so make it specific.
Below the name are your instructions. Instructions are turned on by default and your client sees them, so use them to say who you are and what you need.
You can turn instructions off with the Enable Request Instructions switch, but leave them on for your first request. A client who has never used Content Snare needs the introduction.
When you're done, click Save and continue.
Add or change questions
Now you're in the Builder. Your template already has questions, so for a first run you can move straight through. When you want to add or remove questions, add questions to a request covers it.
Anything you change here stays on this request. The template you started from doesn't change, so it's ready to reuse next time.
Click Save and continue, look over the Preview of what your client will see, then click Finalize.
Send it to yourself
Before Content Snare lets you publish, a request needs a client and a due date. That's what this last step collects.
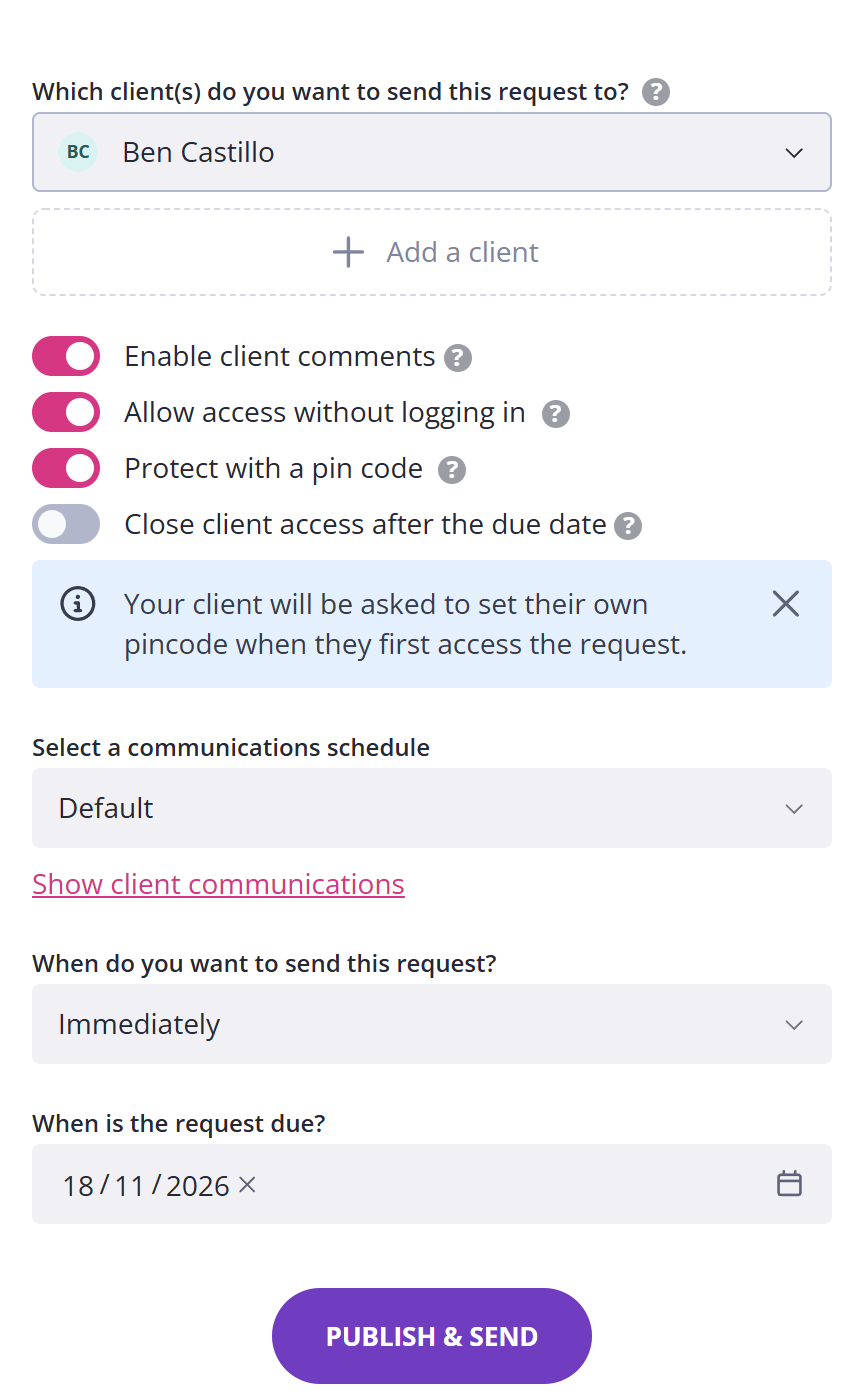
For your first request, be your own client:
- Open the client dropdown.
- Click Create new client.
- Enter an email address that isn't the one you log in with.
Your login email won't work here. Each address in Content Snare belongs to one person, so use a personal or secondary one instead. It's also how you'll receive the request and follow it like a client would.
Content Snare suggests a due date. Keep it or pick another.
Choose how your client is emailed
The last choice is the communications schedule, under Select a communications schedule. Every account comes with two.
- Default sends the first email now and follows up with reminders as the due date gets closer.
- No automatic reminders sends the first email but no reminders after it.
Either works for a test.
The dropdown also includes a Don't send any messages to my client option. Pick it and nothing goes out, not even the link your client needs to open the request. Skip it unless you intend to send the link yourself.
When you're ready, click Publish & Send.
What happens next
Content Snare emails your client a link to open the request and start answering. Because you sent this one to yourself, that email lands in your own inbox. Open it to see what your client sees and try filling in a few answers.